How to use the Board specific settings
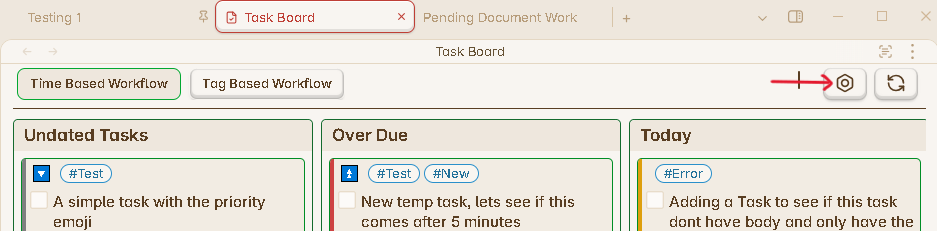
You can open the Board Specific Settings from the Board configure button on the top right corner in the Task Board View as can be seen in the below image.
This will open the settings panel as shown below :
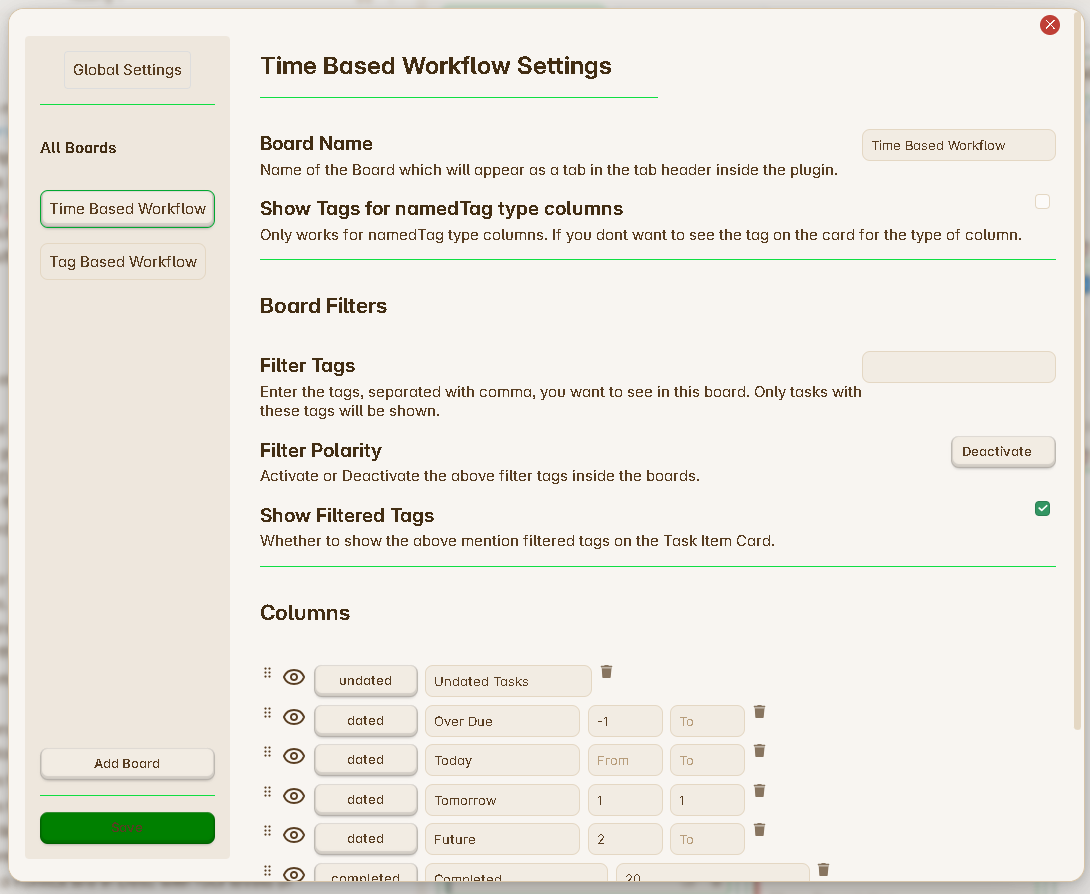
Learn more about all the UI elements of this modal from here : Board config modal.
Basic Settings
Board name
In this text input field you will be able to enter the Name of the Board or change it any time
Board description
This will be a textarea input box where you can add description about this board. This setting will help to provide more information for this board. This description will be also visible inside the switch board panel.
Show tags in task card header
This settings only works for Tagged type of columns.
Since, the column of type “Tagged” will show all the tasks which has the specific tag in them. Then it makes no sense to show that specific tag inside the task item card header when the cards will be rendered inside those columns. Because, its obvious that all the tasks under the specific “Tagged” type column will going to have that tag anyways. Hence you can decide to hide this tag, from all the Task Items under this column.
For multi-tag Task Item, other tags will be show, only the specific tag will be hidden.
Auto hide empty columns
Enable this setting if you dont like to see any empty columns inside your boards. The column will be present under the board configurations, but it will be hidden when there are no tasks to show in that column. This setting will help you to have a clean kanban view.
Configure swimlanes
If you like to have swimlanes for the kanban view, you can click on the Configure button in this setting which will open the swimlane config modal. Then proceed to configure all the required settings in that modal.
Columns
Under this section of settings you will see a tabular format arrangement to configure the columns under this board and also change their position.
The first row in this tabular data show the information of the Task Board column and it will be show at the first position in the Task Board View. Followed by the rest of the Columns in order.
Properties of the Column
Handler Button : This button helps you to drag and drop the row, to arrange the postion of the Column inside the Task Board. If you want to change the position of the column, say from the first position to the third. Then you will have to drag the row inside this Tabular data to the third position. After saving your column will be moved to the third position from the first.
Eye Icon : Use this button to hide your column from your board. If say, you dont want to see a specific column in the current board, but also do not want to delete that column. You can keep the board hidden, as long as you want.
Column Type : At present the plugin supports 6 different types of columns. Learn more about each of them and how to enter the values to create these columns from here : Types of Columns.
Column Name : This text input field will allow you to enter or change the name of the column. You can enter a custom name, which you would like to see on the Column bar.
Column Properties : You will notice there are further more fields, which are specific to the column type.
Max number of Items : Currently this feature is only available to a column of type Completed, to restrict from showing all your completed tasks. Its recommended not to show all your completed tasks on the board, if you have completed many tasks. Only show few tasks under this column, by entering the number here, how many tasks you want to see under this column, which will help you to render the board faster.
- In the future releases, there will be a new window to see all your completed tasks.
Delete Icon : Using these Icons, you can able to delete the specific Column from the board. This will only delete the column and wont affect any of your tasks. You can easily create the column back if you know the configuration of this column.
Add Column Button
This button allows you to add more column to this board. Once you press on this button, the add new column modal should open as shown in the below image :
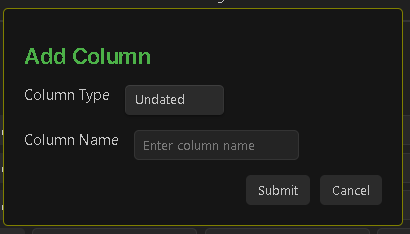
Read more about this here : How to add a new column.
Delete This Board Button
This button will delete the current board. After you click on this button, a pop up will appear to ask you for Confirmation.
This operation is only reversible till you click on the save button, after that the changes will be saved. Take care while delete the board. But its also easy to create a new board, if you remember the board structure. Don’t worry!
Deleting a board or changing any setting inside the board makes no changes to you tasks. You can only change the content of your tasks either from the Task Editor or using the delete button inside the Task Item Card.
Save Button
Save Button
Remember to press on the
Savebutton after you have changed any value for the Board settings.
This button has been specially added so you can make as many changes as you like, but if you have made any mistakes, you can simply close the modal, so your mistakes are ignored.