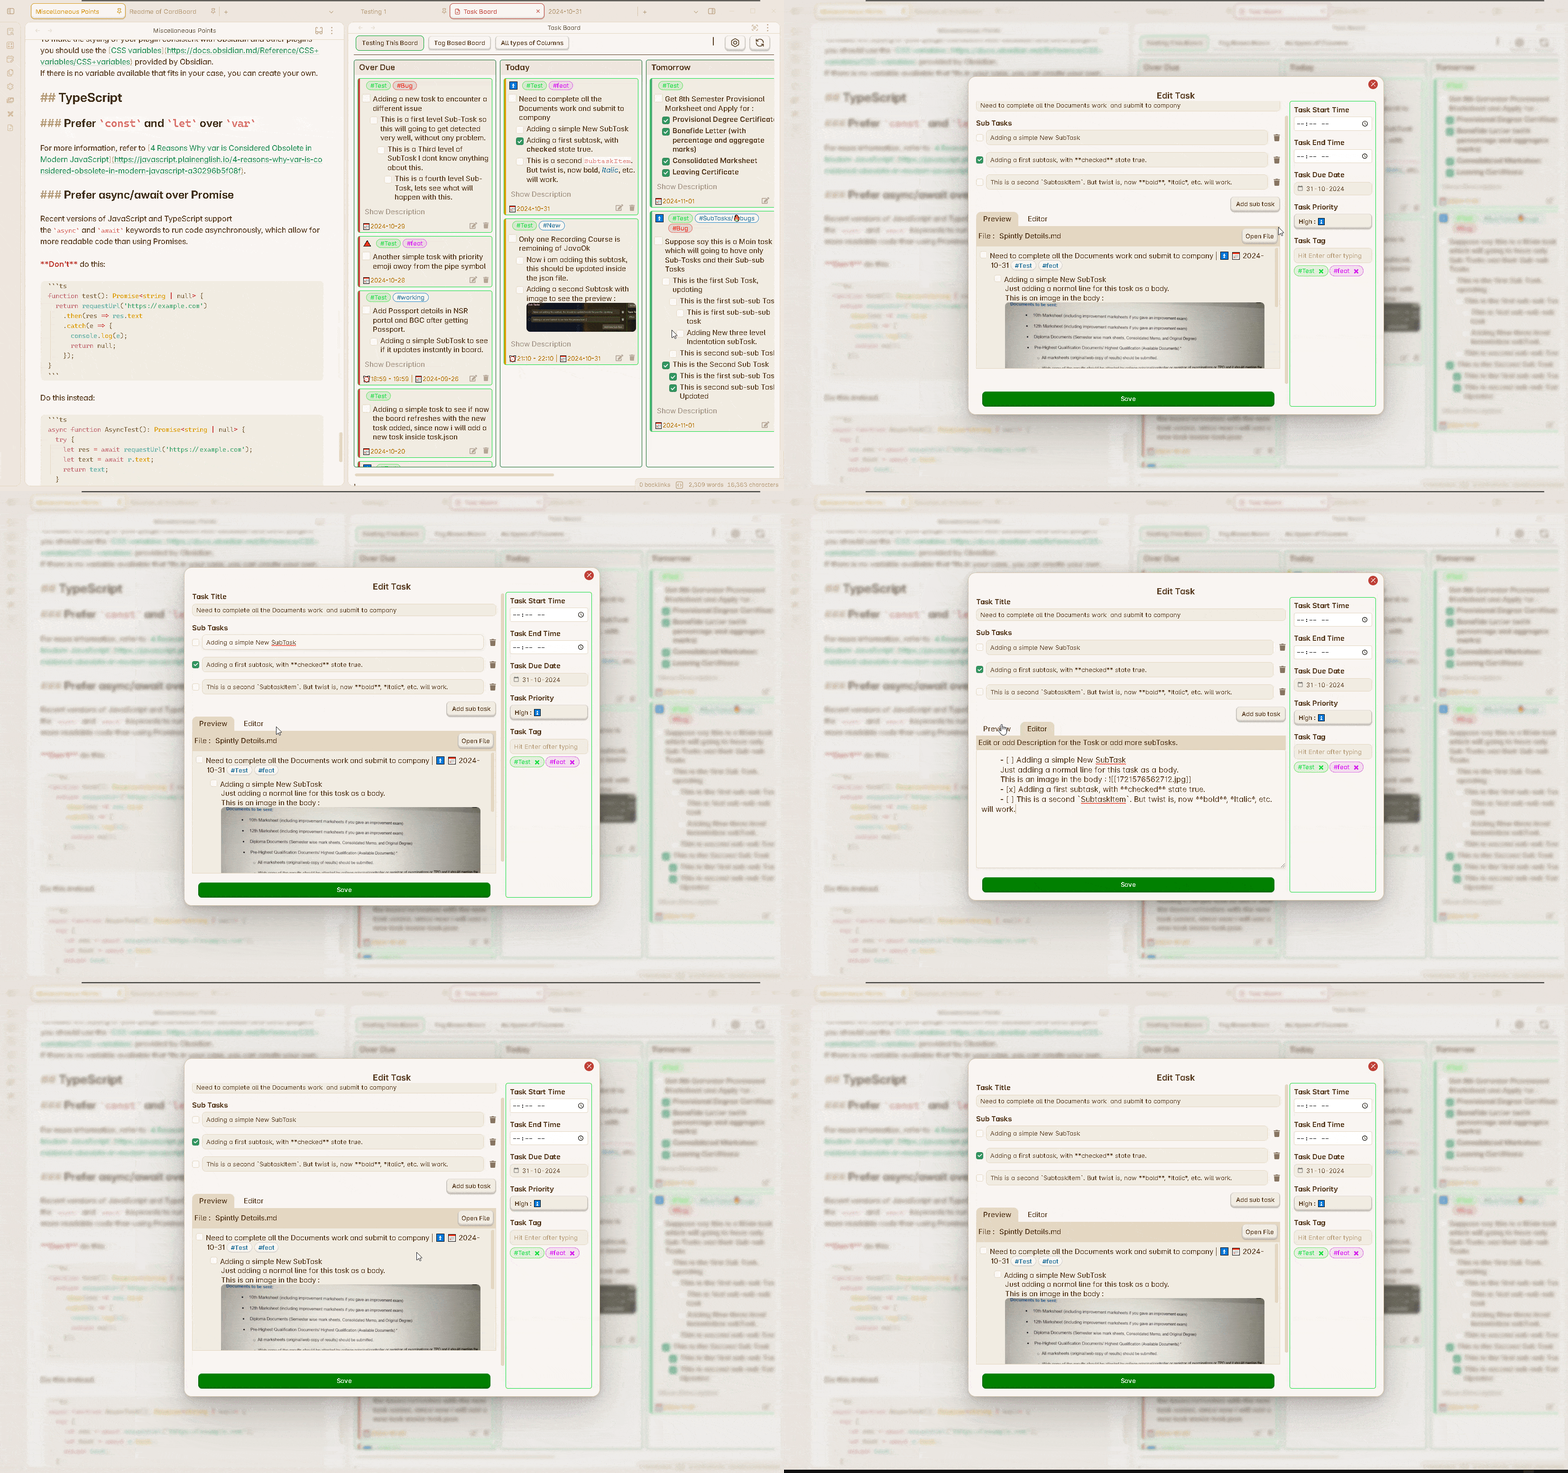
Edit Task Window
This is a pop up window which helps you to edit your tasks or add more fields to your task easily without opening the markdown file.

Sections of the Window
Left Section
-
Title Input Field : First there will be a text field to take the Main Title of the task. This can be a complete single task, like a whole paragraph. But Kanban philosophy follows the approach of giving a title to your tasks and then explaining it further in other section. So, it will be a good practice to give a short name to your task, which you will be able to see on the Task Board.
- Sub-Tasks Section : Next will be a section to add sub-tasks to your main task. Again it will be recommended to give a short one line summary for creating a sub-task, you can explain further your sub-tasks in the Description section. Sub-Task only works with single indentation levels, since Obsidian supports multi-layers of indentation, you can add such multi-level indented sub-tasks in the description.
-
You can either edit the content of your old sub-tasks from the text input field. Or add more sub-tasks using the
Add Sub Taskbutton, which will create a new text input field for you to enter the new sub-task. - Preview / Description Section : This is a section where you can see two button to change the section in a Section tab.
- The default section will be the preview, where you can see the preview of you task, exact the way it will look like in your markdown file in Reading Mode.
- The second button is Edit, which will open a section with a Text Area box, in which you will see the content of the task, except the first line of the task, which is the title and other properties. Using this text area field, you can edit the sub-tasks, add more multi-level sub tasks or add simple text to the as a description for the main task.
- Please note that, even if you add any line without indentation, it will be automatically get indented by one level according to the task format.
Right Section
Under this section you can able to add the following fields to your task. All the below sections are optional properties for task.
- Task Due Time : This is a time field, when you will click on this field, you will get a menu to select the time for your task. These section is divided into a Start Time and End Time. This feature will help you, if you are using Day Planner plugin, to plan your every day timeline.
- Start Time : Enter the time when you are planning to complete your task, this is the time when you will start doing the task.
- End Time : By default, when you will select the start time, this field will be automatically populated with an one hour incremented value from your Start Time. You can easily change this value, to change the duration of the task.
-
Task Due Date : This is a date field. When you will click on this input field, you will be presented with the calender menu to select your date for scheduling the task and the value will be auto populated in the input field, which you can change later as well.
-
Task Priority : This is a Drop Down input field, where you will be able to select the priority for the current task. Currently there are fixed 5 priorities you can give. In future releases this feature will be enhanced to give your custom priority values and increase the priority options.
- Task Tag : This is a special type of text input field. After you type the tag name/string, you have to press on the
Enterkey to register the tag. When you will hit Enter, you will see the tag has been attached to the task and also the color of the tag, if you have set your own Custom Color Tags. So, you will get get a preview of how your tags will look on the board below this input field.
Save Button
After you have made all the changes, remember to press on the Save Button, which you will see at the bottom of the Left Section. None of your changes will be saved until you click on this button.